
Edit: tutorial#2 up and runnin! hope u like it!
Edit: tutorial#2 up and runnin! hope u like it!
0
posted08/23/2007 07:46 PM (UTC)byMember Since
06/29/2003 04:54 AM (UTC)
I hope some of you find this GIMP tutorial usefull! its my first so im not sure how well written it is for a tut! ENJOY!

here's the direct link if the imageshack thumb is crappy:
http://img171.imageshack.us/img171/1569/tutorialqk5.png
My second tutorial! I hope im clearer in this one... if u have any trouble w either of them just ask away!

link
http://img470.imageshack.us/img470/5903/tutorial2ui4.png hope u like these!


0
Ahhh! wonderfull! lol
cant wait to see more results!
cant wait to see more results!

This has to be the best tutorial for GIMP that I have seen so far. Those tutorials from Gimptalk require much less experience, and the outcomes don't really impress me. So Kam, I'm realling looking forward in seeing more of your tutorials.


0
wow really nice tutorial ima make a sig and show you the results well can you help me from step 6 til the end lol i dont know what a C4D and all that stuff is yet
0
DevilJin Wrote:
wow really nice tutorial ima make a sig and show you the results
i dont know how to do step 6 can you help me?
wow really nice tutorial ima make a sig and show you the results
i dont know how to do step 6 can you help me?
SURE! Press Ctrl L and a little window w layers will show up. Click on the layer w the gradient map on the little pop-up window, and on the top where it saysMode: and its in "normal" click and on the scrolling list and choose "Soft Light"... in the same pop-up window there is a little slide button that says Opacity, scroll it to the left till u get a very soft coloration.
hope that helped
0
DevilJin Wrote:
thanx but i dont know what a C4D is
those a C4D make the BG like it is in the 4th picture?
thanx but i dont know what a C4D is
those a C4D make the BG like it is in the 4th picture?
C4D are 3d sbstract renders... and yes... when used like in this tut they make the BG look like in the 4th pic... just google image C4D and u'll find a bunch
this is a good example of one:
http://i75.photobucket.com/albums/i311/Sylux77/9thbig4kt.png
0
Kamionero Wrote:
C4D are 3d sbstract renders... and yes... when used like in this tut they make the BG look like in the 4th pic... just google image C4D and u'll find a bunch
this is a good example of one:
http://i75.photobucket.com/albums/i311/Sylux77/9thbig4kt.png
DevilJin Wrote:
thanx but i dont know what a C4D is
those a C4D make the BG like it is in the 4th picture?
thanx but i dont know what a C4D is
those a C4D make the BG like it is in the 4th picture?
C4D are 3d sbstract renders... and yes... when used like in this tut they make the BG look like in the 4th pic... just google image C4D and u'll find a bunch
this is a good example of one:
http://i75.photobucket.com/albums/i311/Sylux77/9thbig4kt.png
thank you very much
0
UlcaTron Wrote:
Yeah, on the left it gives you a + sign. You can click and drag parts of the C4D with it and then press okay.
DevilJin Wrote:
hmm whwn i went to IWARP for some reason it didnt do anything to the picture
hmm whwn i went to IWARP for some reason it didnt do anything to the picture
Yeah, on the left it gives you a + sign. You can click and drag parts of the C4D with it and then press okay.
oh shit lol i thought if i jus switched the stuff on the right it'll jus make the images like that man i fell dumb lol

About Me

0
These are really nice tuts, Kamionero. Here's my outcome for the Wario one:

I didn't add the 2 c4ds in one of the steps and the vertical rectangle on the side.
The white dots around Yoshi is from a couple of white splatter brushes and a bit of brushing with a 3 px brush set with some scattering and an outer glow. Yeah, the text is kinda wierd.
I didn't add the 2 c4ds in one of the steps and the vertical rectangle on the side.
The white dots around Yoshi is from a couple of white splatter brushes and a bit of brushing with a 3 px brush set with some scattering and an outer glow. Yeah, the text is kinda wierd.
0
well im done i kno it wasnt wario but w/e it sucks honestly i didnt use gradient for the hand like you did cuz every time i tried it would fill up too much and i couldnt see the BG

please tell me step by step what i did wrong + i didnt kno if i was suposed to keep the image ancored or not. most chances it came out like this bcuz 1 i was soooo confused and frustrated at the same time so i skipped some parts like 17 preety much til i put the border and text (yes i got that impatient ) well maybe if im not following somthing step by step i might have made it look alot better not good at following stuff step by step as you all can see
please tell me step by step what i did wrong + i didnt kno if i was suposed to keep the image ancored or not. most chances it came out like this bcuz 1 i was soooo confused and frustrated at the same time so i skipped some parts like 17 preety much til i put the border and text (yes i got that impatient

DevilJin Wrote:
well im done i kno it wasnt wario but w/e it sucks honestly i didnt use gradient for the hand like you did cuz every time i tried it would fill up too much and i couldnt see the BG
please tell me step by step what i did wrong + i didnt kno if i was suposed to keep the image ancored or not. most chances it came out like this bcuz 1 i was soooo confused and frustrated at the same time so i skipped some parts like 17 preety much til i put the border and text (yes i got that impatient) well maybe if im not following somthing step by step i might have made it look alot better not good at following stuff step by step as you all can see
well im done i kno it wasnt wario but w/e it sucks honestly i didnt use gradient for the hand like you did cuz every time i tried it would fill up too much and i couldnt see the BG
please tell me step by step what i did wrong + i didnt kno if i was suposed to keep the image ancored or not. most chances it came out like this bcuz 1 i was soooo confused and frustrated at the same time so i skipped some parts like 17 preety much til i put the border and text (yes i got that impatient
WTF is that text? I wanna download it. It rocks.

About Me

0
Wow, Kaminero, i really like the 2nd tut, much easier to follow for someone of my sigmaking ability, and has a great outcome. I'll post the result of the 2nd tut later.
EDIT: Here's the result for the second tut.......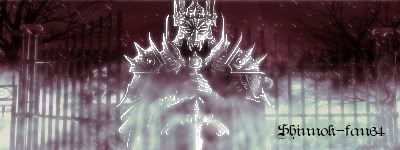 looks awesome imo, love it.
EDIT: Here's the result for the second tut.......
looks awesome imo, love it.0
Amazing job Shinnok-fan64!!!! right on the spot!
Same w you hikari! amazing yoshi sig!
Always anchor ur selection! as soon as u have it whene u want anchor it.
Hmmm... it looks like u sharpened too much, and some llayers seem to be on Dodge instead od screen or soft light...
also needs a little dessaturation.... go lo layers>Hue saturation and on the Saturation bar lower it a little bit till is not that bright colored
Same w you hikari! amazing yoshi sig!
DevilJin Wrote:
well im done i kno it wasnt wario but w/e it sucks honestly i didnt use gradient for the hand like you did cuz every time i tried it would fill up too much and i couldnt see the BG
please tell me step by step what i did wrong + i didnt kno if i was suposed to keep the image ancored or not. most chances it came out like this bcuz 1 i was soooo confused and frustrated at the same time so i skipped some parts like 17 preety much til i put the border and text (yes i got that impatient) well maybe if im not following somthing step by step i might have made it look alot better not good at following stuff step by step as you all can see
well im done i kno it wasnt wario but w/e it sucks honestly i didnt use gradient for the hand like you did cuz every time i tried it would fill up too much and i couldnt see the BG
please tell me step by step what i did wrong + i didnt kno if i was suposed to keep the image ancored or not. most chances it came out like this bcuz 1 i was soooo confused and frustrated at the same time so i skipped some parts like 17 preety much til i put the border and text (yes i got that impatient
Always anchor ur selection! as soon as u have it whene u want anchor it.
Hmmm... it looks like u sharpened too much, and some llayers seem to be on Dodge instead od screen or soft light...
also needs a little dessaturation.... go lo layers>Hue saturation and on the Saturation bar lower it a little bit till is not that bright colored
0
taken from the gimp tut:
How to install Brushes
Okay, so I was asked this yesterday on how to install brushes and if I remember correctly when I was a noob at GIMP, I didn't even know how to install brushes until DE showed me through PM lolz. Here you will find a list of 7 steps, all screencapped on how to install brushes*:
Step 1 - Right-Click on the GIMP icon on your desktop and click on Properties
STep 2 - Click "Find Target"
Step 3 - Click GIMP-2.0 on the left side.
Step 4 - Click on the folder called Share
Step 5 - Click on the folder called GIMP
Step 6 - Click on the folder 2.0
Step 7 - Click on the Brushes folder
* Please make sure that before doing any of these steps that you DOWNLOAD and EXTRACT the files first before performing any of these steps. The steps included are for Windows XP. I don't how it's done for any other system.
the brushes I usedd are called Charcoal.. but I cant find them anymore...
these should work fine
http://www.deviantart.com/deviation/26811654/?qo=41&q;=gimp++brush+boost%3Apopular+age_sigma%3A24h+age_scale%3A5+in%3Aresources%2Fapplications%2Fgimpbrushes
0
Kamionero Wrote:
taken from the gimp tut:
How to install Brushes
Okay, so I was asked this yesterday on how to install brushes and if I remember correctly when I was a noob at GIMP, I didn't even know how to install brushes until DE showed me through PM lolz. Here you will find a list of 7 steps, all screencapped on how to install brushes*:
Step 1 - Right-Click on the GIMP icon on your desktop and click on Properties
STep 2 - Click "Find Target"
Step 3 - Click GIMP-2.0 on the left side.
Step 4 - Click on the folder called Share
Step 5 - Click on the folder called GIMP
Step 6 - Click on the folder 2.0
Step 7 - Click on the Brushes folder
* Please make sure that before doing any of these steps that you DOWNLOAD and EXTRACT the files first before performing any of these steps. The steps included are for Windows XP. I don't how it's done for any other system.
the brushes I usedd are called Charcoal.. but I cant find them anymore...
these should work fine
http://www.deviantart.com/deviation/26811654/?qo=41&q;=gimp++brush+boost%3Apopular+age_sigma%3A24h+age_scale%3A5+in%3Aresources%2Fapplications%2Fgimpbrushes
i extracted the files and everything and put it in the folder but nothing happened. is it because i put it in the brushes folder in the gimp-2.2.0 folder?
0
well i did it right this time didnt do tenticles cuz i didnt kno where the tool to do it was and its still not as cool as urs and ulcatron (i have no clue how ulca made his like that lol) but im still learnin
http://i19.tinypic.com/4q3r7cw.gif" border="0" alt="Image and video hosting by TinyPic
http://i19.tinypic.com/4q3r7cw.gif" border="0" alt="Image and video hosting by TinyPic
0
ACtually looks good!
one thing tho! Dont save it as a .GIF cause the quality really goes down, save it as a .PNG and it'll look much better.
also, if u wanna save the unfinished product and all the layers, save it as an .XCF
one thing tho! Dont save it as a .GIF cause the quality really goes down, save it as a .PNG and it'll look much better.
also, if u wanna save the unfinished product and all the layers, save it as an .XCF
0
UlcaTron Wrote:
Here is my result for the second sig tut:
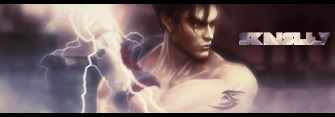
As you can tell, I did some of my own techniques in there as well. (Lightning, lighting, etc..)
Here is my result for the second sig tut:
As you can tell, I did some of my own techniques in there as well. (Lightning, lighting, etc..)
thats great!
come on ppl! keep tryin it and postin


© 1998-2025 Shadow Knight Media, LLC. All rights reserved. Mortal Kombat, the dragon logo and all character names are trademarks and copyright of Warner Bros. Entertainment Inc.